Frequently Asked Questions
Promotions
-
What are the T&Cs of your current promotions?
• Only 1 promo code can be applied per order.
• Promo codes exclude shipping fees unless otherwise stated.
• Promo codes exclude optional upcharges.
• Promo codes are non-transferable and cannot be used on other sites.
• Sales items are not exchangeable or refundable.
• p;log may change/discontinue discounts and T&Cs without notice.
Creating a Project
-
How do I start my project?
1. Register an account with us on our website. A confirmation email of your registration will be sent to your email(check your spam folder if you do not receive it within 2 minutes)
2. On the top right-hand corner, navigate to “My Projects” to save and work on your orders
3. Before using our online editor, you need to select your preferences on our product page.From our editor, you can upload your photos and design your product. -
What browsers can I use for your online editor?
Our online editor requires a large screen. Hence, we advise you not to use your smartphone to work on your projects as some features may not be easily accessible.
For a better user experience, we recommend you work on your project using desktops and tablets.
The following browsers are compatible with our online editor:
• Google Chrome (Highly recommended)
• Apple Safari
• Mozilla Firefox -
How to Select the Best Photo Paper and Finishes for Your Prints?
Gloss Paper/ Finishes
Gloss allows photo prints with vibrant colours to stand out, highlighting their sharp details.
Due to its highly reflective and sticky surface, Gloss is not suitable for:
Vintage Style Photography e.g. black and white, sepia tones
Large size photo prints
Photo prints displayed behind a glass frame
Matte Paper/ Finishes
Matte paper’s smooth texture gives photo prints a more neutral and natural look.
Matte reflects minimal light. It is best suited for photo prints displayed in brightly lit areas.
If your photos will be handled often, matte would be a better choice since they are less prone to scratches and fingerprint marks.
Photo Lustre Paper
Lustre allows vibrant colours to shine like gloss and gives a soft texture resembling matte.
Lustre is a less reflective surface than gloss which reduces the glare in prints, making the image easier to see at all angles.
Lustre is suitable for photo prints that require frequent handling, as it is less prone to minor scratches and fingerprint marks.
Synthetic paper(for stickers)
Synthetic paper is a semi-gloss, semi-matte adhesive
It is resistant to water, tears, and smudges.
Its ultra-smooth surface provides a perfect canvas for detailed illustrations, sharp text, and bold photography
Cast-coated paper(for stickers)
Cast-coated paper has a semi-gloss smooth finish on one side.
It can be used for labels/stickers and packaging with its high-qualityprinting and desirable shiny surface.A thicker photo paper gives the photo book a more premium feel. It warps less easily under hot weather, allowing your photo books to last longer.
-
Which Binding Type should I choose?
Layflat binding: Layflat allows your photographs to spread seamlessly across your photo book, giving you a panoramic visual experience.
Layflat only allows for a maximum of 60 pages.PUR binding: The pages are glued firmly to the spine of the book.
PUR Binding uses a stronger adhesive that makes the pages of the photo book more resistant to pull-outs, with less damage to its spine.Side-sewn binding: The pages are stitched together with a thread, allowing the photo book to withstand more rough handling.
Side-sewn binding allows the photo book to lay flatter, allowing your content to be seen more within its gutter. -
Can I work on multiple projects?
Yes, you can. Once you have logged in, your projects can be found under “User” > “My Projects”. You can select any project to work with, save and revisit them later without losing your edits. All photos within your galleries will also be stored in the editor.
You can use multiple browsers to work on your projects, so long as it is under the same account. However, please do not open all your browsers on the same page at one time. -
Can I share my project?
Yes, you can send a preview link for others to view your project.
Under the “My Projects” page, click on the icon at the bottom right of the project you want to share.
Invitees will be able to VIEW but NOT EDIT your project. -
Can I customise my own design without using your pre-set layouts?
For special customisations related to binding and other designing services, please email hello@plog.com.sg 30 days in advance.
Your customised designs may be subjected to additional charges (due to more time needed to coordinate these changes) and our service availability. -
Can I use another platform/software to design my project?
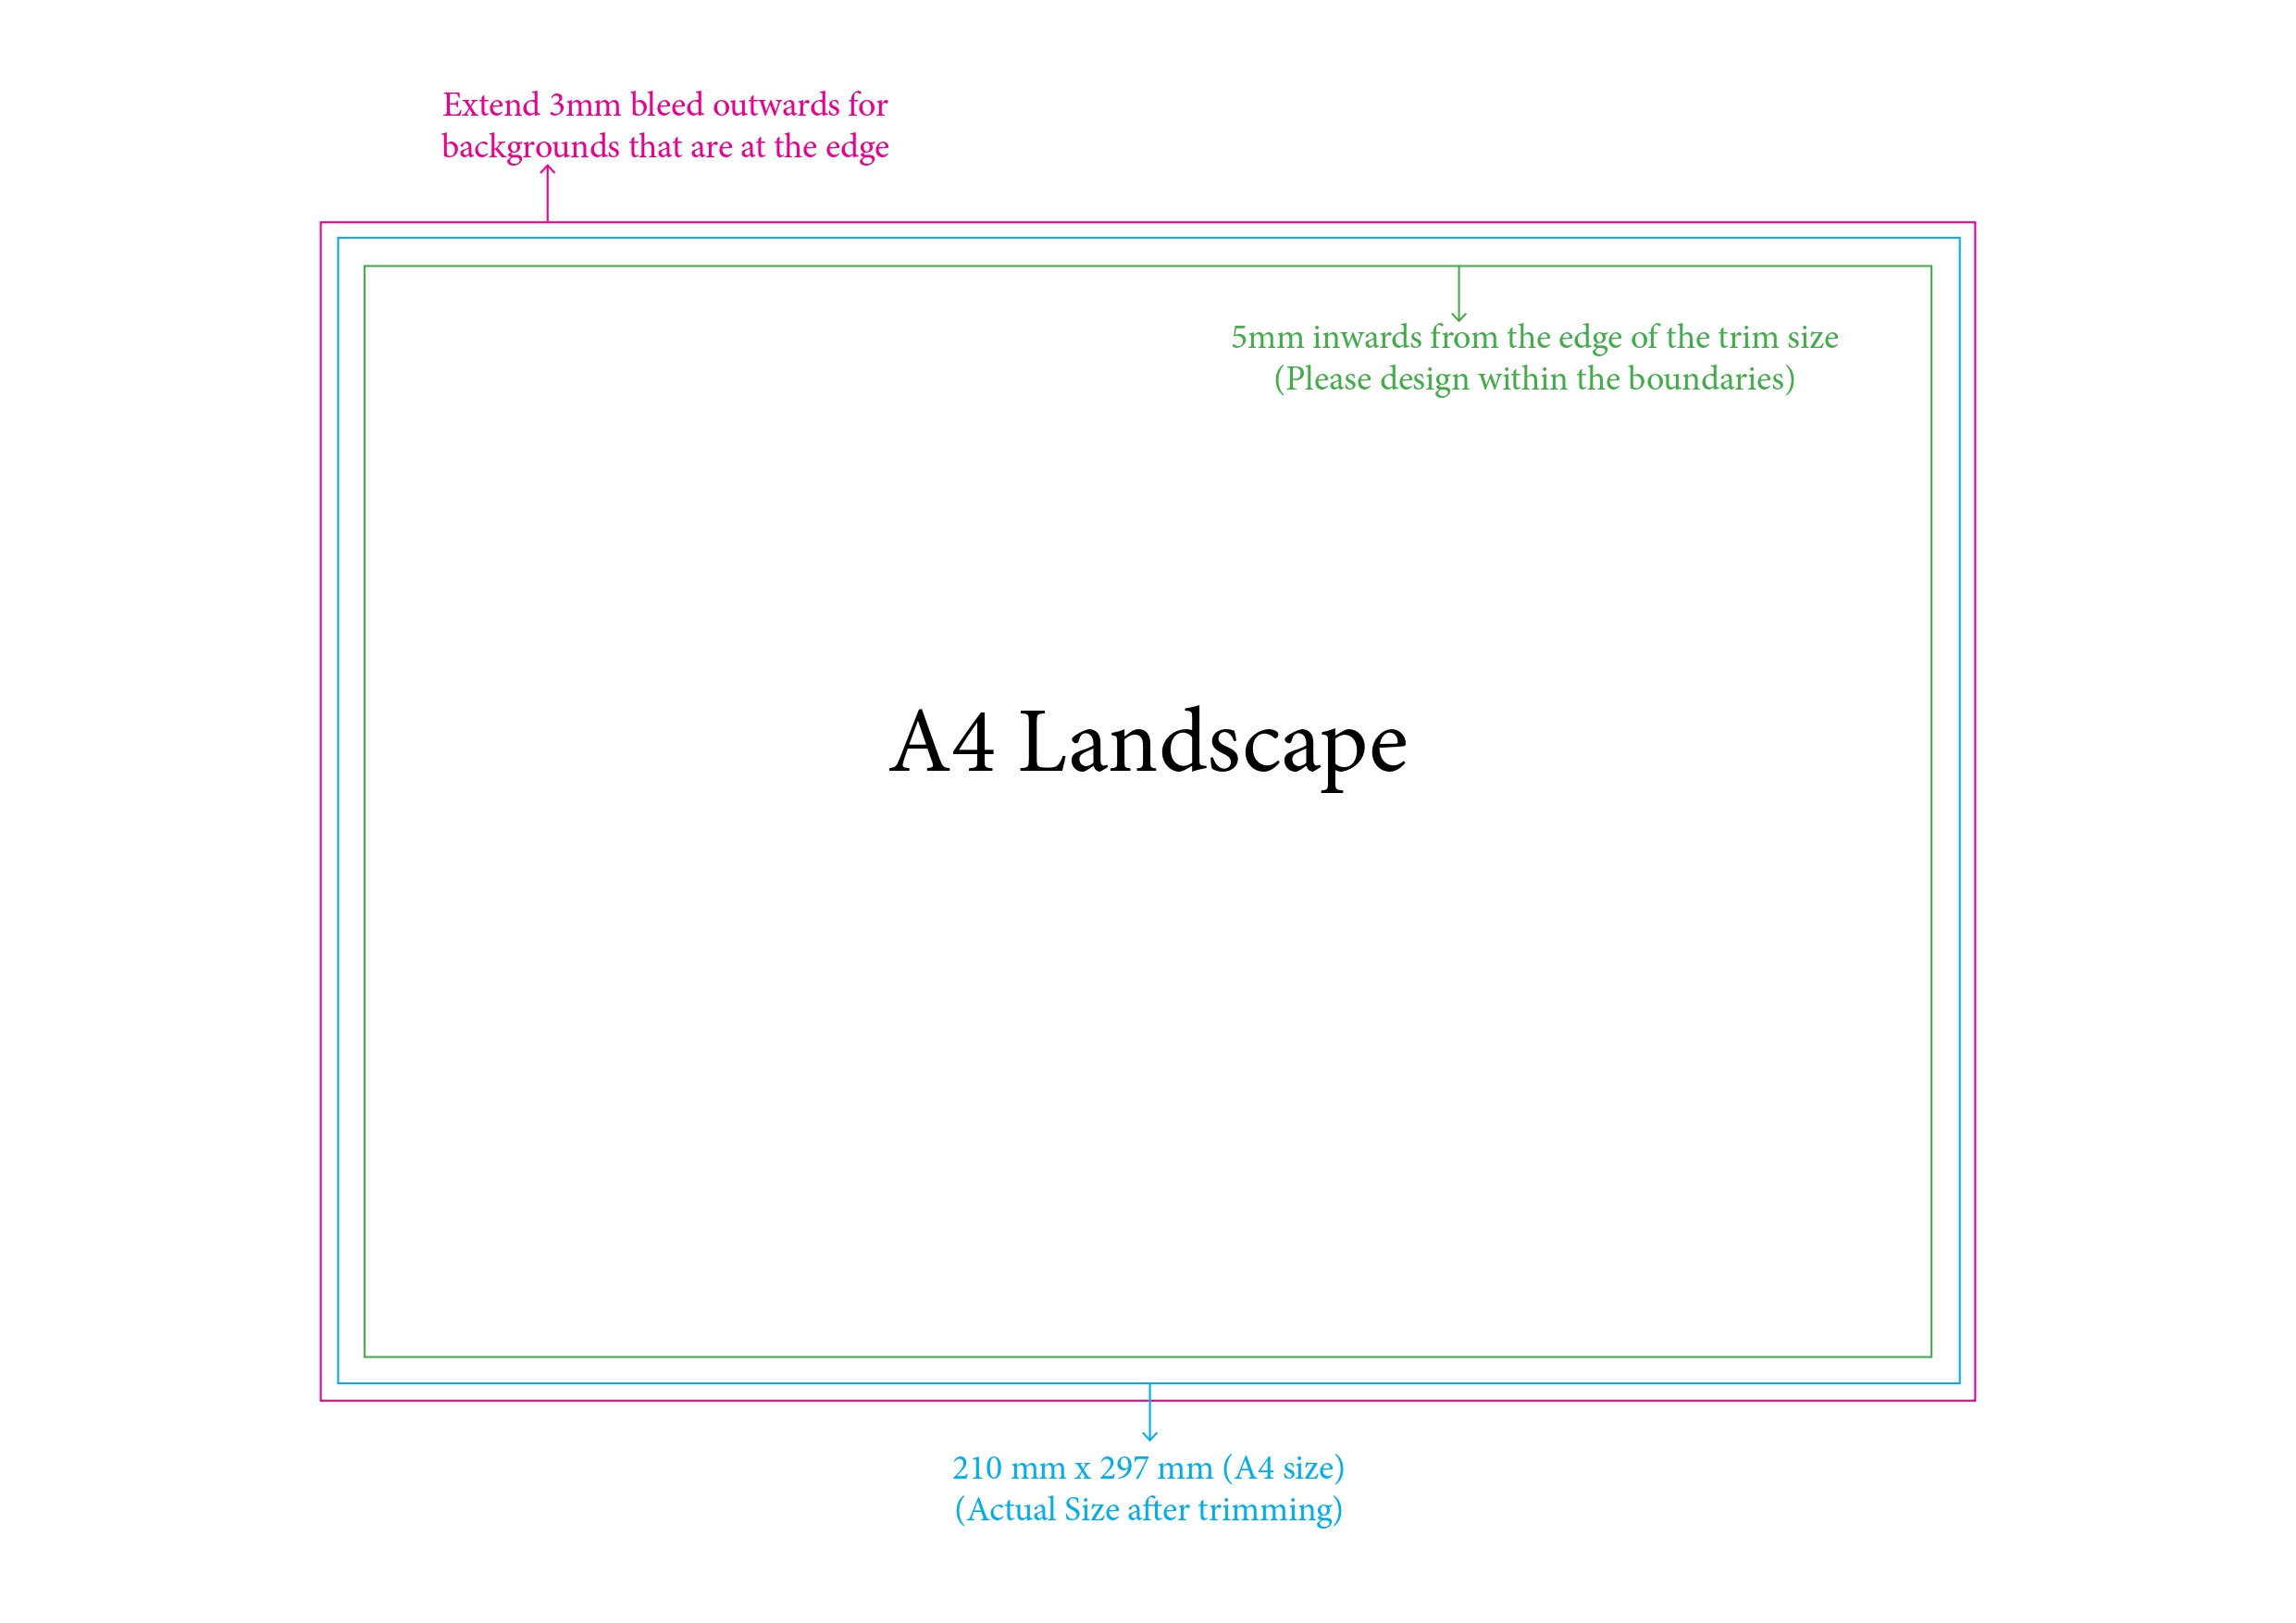
Yes, you can*. However, please ensure that your file is optimised for printing. Carefully check that your file is:
- Sized to A4
- Saved in PNG/PDF format
- Included with 5mm bleed on all sides to prevent under or over-trimming of your pages
For more information, please refer to our dimension guidelines below .

*It is highly recommended that you utilise our online editor as the specifications listed above will be automatically optimised for you. Moreover, the benefits of our online editor include:
- Easy transfer of predesigns from third-party software/platforms
- Automated prompts on low resolution images
- Instant reflection of final product pricing
- Review the order of your pages at a glance
- Rectify any mistakes in product format or design
-
Can I Create My Design in Canva?
In Canva, click on Create a Design and select Custom Size.
Set the document size to A4 with bleed:
Portrait: 216mm (Width) × 303mm (Height)
Landscape: 303mm (Width) × 216mm (Height)
Once the size is entered, click Create New Design.
You may then begin designing your pages and add additional pages if required. -
How to Export from Canva?
- On the top right-hand corner, click Share.
- Click Download.
- If you are using a paid Canva account, select PDF Print.
- If you are using a free account, select PDF Standard.
- Select all pages and click Done.
- Finally, click Download to save the PDF file to your device.
-
How to Import into Our Platform?
- Choose your preferred book size and proceed to the Editor.
- Select your PDF file from your desktop window.
- Simply drag and drop the PDF pages into the editor starting from Page 1 onwards.
- A prompt window will appear — click Import.
- Your pages will then be automatically arranged nicely in the editor.
-
How do I transfer the design I made on another platform/software to your online editor?
Firstly, download or save each page of your design as a separate PDF/PNG file. Do NOT screenshot your pages, as this will reduce image resolution and make them unsuitable for printing.
Next, drag and drop your files into our online editor and resize them accordingly until they fit within the safe area. Multiple files can be selected and uploaded at any one time.
For a visual demonstration, please refer to our video tutorial.
Once your files are uploaded onto our online editor, our system will prompt you if you have any low-resolution images that you might wish to replace. Additionally, you can ensure that your page order is correct, and manage the final pricing of your product.
-
Can I duplicate a previous project?
Go to "MY PROJECTS"
Click on the 3 dots and click “Copy” to duplicate your project
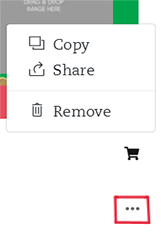
The duplicated copy will be created with the latest time/date. It is highly recommended to rename your project to avoid confusion
-
Can I copy a page from one project to another?
The following elements can be copied over:
-Clipart
-Images on the page
-Images inserted as the background
-Text boxesBackgrounds provided by the editor CANNOT be copied over
Steps:
1. On the original project, go to the page you want to copy.
2. CTRL+A to select all the elements
3. CTRL+C to copy all the elements
4. Go to the new project and to the specific page to be pasted on. Click on that page
5. CTRL+V to paste all the elements
6. The elements(that can be copied over) will be copied in the same position as the original project. You can then adjust them accordingly in the new project
video tutorial -
Can I remove previous projects or clear my image gallery?
For images, go to the 'My Galleries' section and remove them directly from there.
For projects, go to the 'My Projects' section and remove them directly from there.
Designing on Editor
-
Can I change the size of my photo book once I start my project?
No, you can’t. To change your photo book size, you need to reselect your desired size on our products page and create a new project.
-
How do I upload my photos?
1. On left tab of the online editor, click on “add gallery”. Galleries allow you to organise your images and keep track of which images have been used and on which page they can be found.
2. Double-click on the gallery to enter.
3. At the bottom of the tab, select “upload images”
4. Drag and drop your desired image from the tab into your yearbook pages.
OR,
Drag and drop your desired photo from your desktop and directly into your yearbook pages.
OR,
Upload pictures from your other devices by scanning the QR code provided when you click “upload images” -
What photo format can I upload?
Our editor accepts images in JPEG, PNG, HEIC and PDF formats.
HEIC images may take a slightly longer time to convert and upload.
As our software is unable to directly retrieve PDF images, you need to drag and drop them from your folder to our online editor.
For images on Google Drive, please download the files to your computer before uploading them to our editor. -
What photo size and resolution can I upload?
For each photo to be printed clearly, we recommend an image resolution of at least 300DPI with a maximum file size of 5MB.
For larger-size products like canvas, we recommend an image resolution of at least 150DPI.
If the photo resolution is too low, our editor will signal a warning on your photograph. To resolve this, compress your photograph or replace it with a higher resolution image.
You may choose to ignore the low-resolution warning and proceed to print your project. However, your photos will be printed based on the image resolution you have uploaded. p;log will not be responsible to check the quality of your images. -
How many photos can I upload?
There is no limit to the number of images you want to upload to the editor and store in your gallery.
However, it is recommended to avoid uploading more than 50 images at one time, as this may slow down the uploading process -
How do I replace pre-existing images in my project with a new image?
1. In the editor, click on the image box of the image you wish to replace.
2. Drag and drop your replacement image from your gallery into the selected text box. -
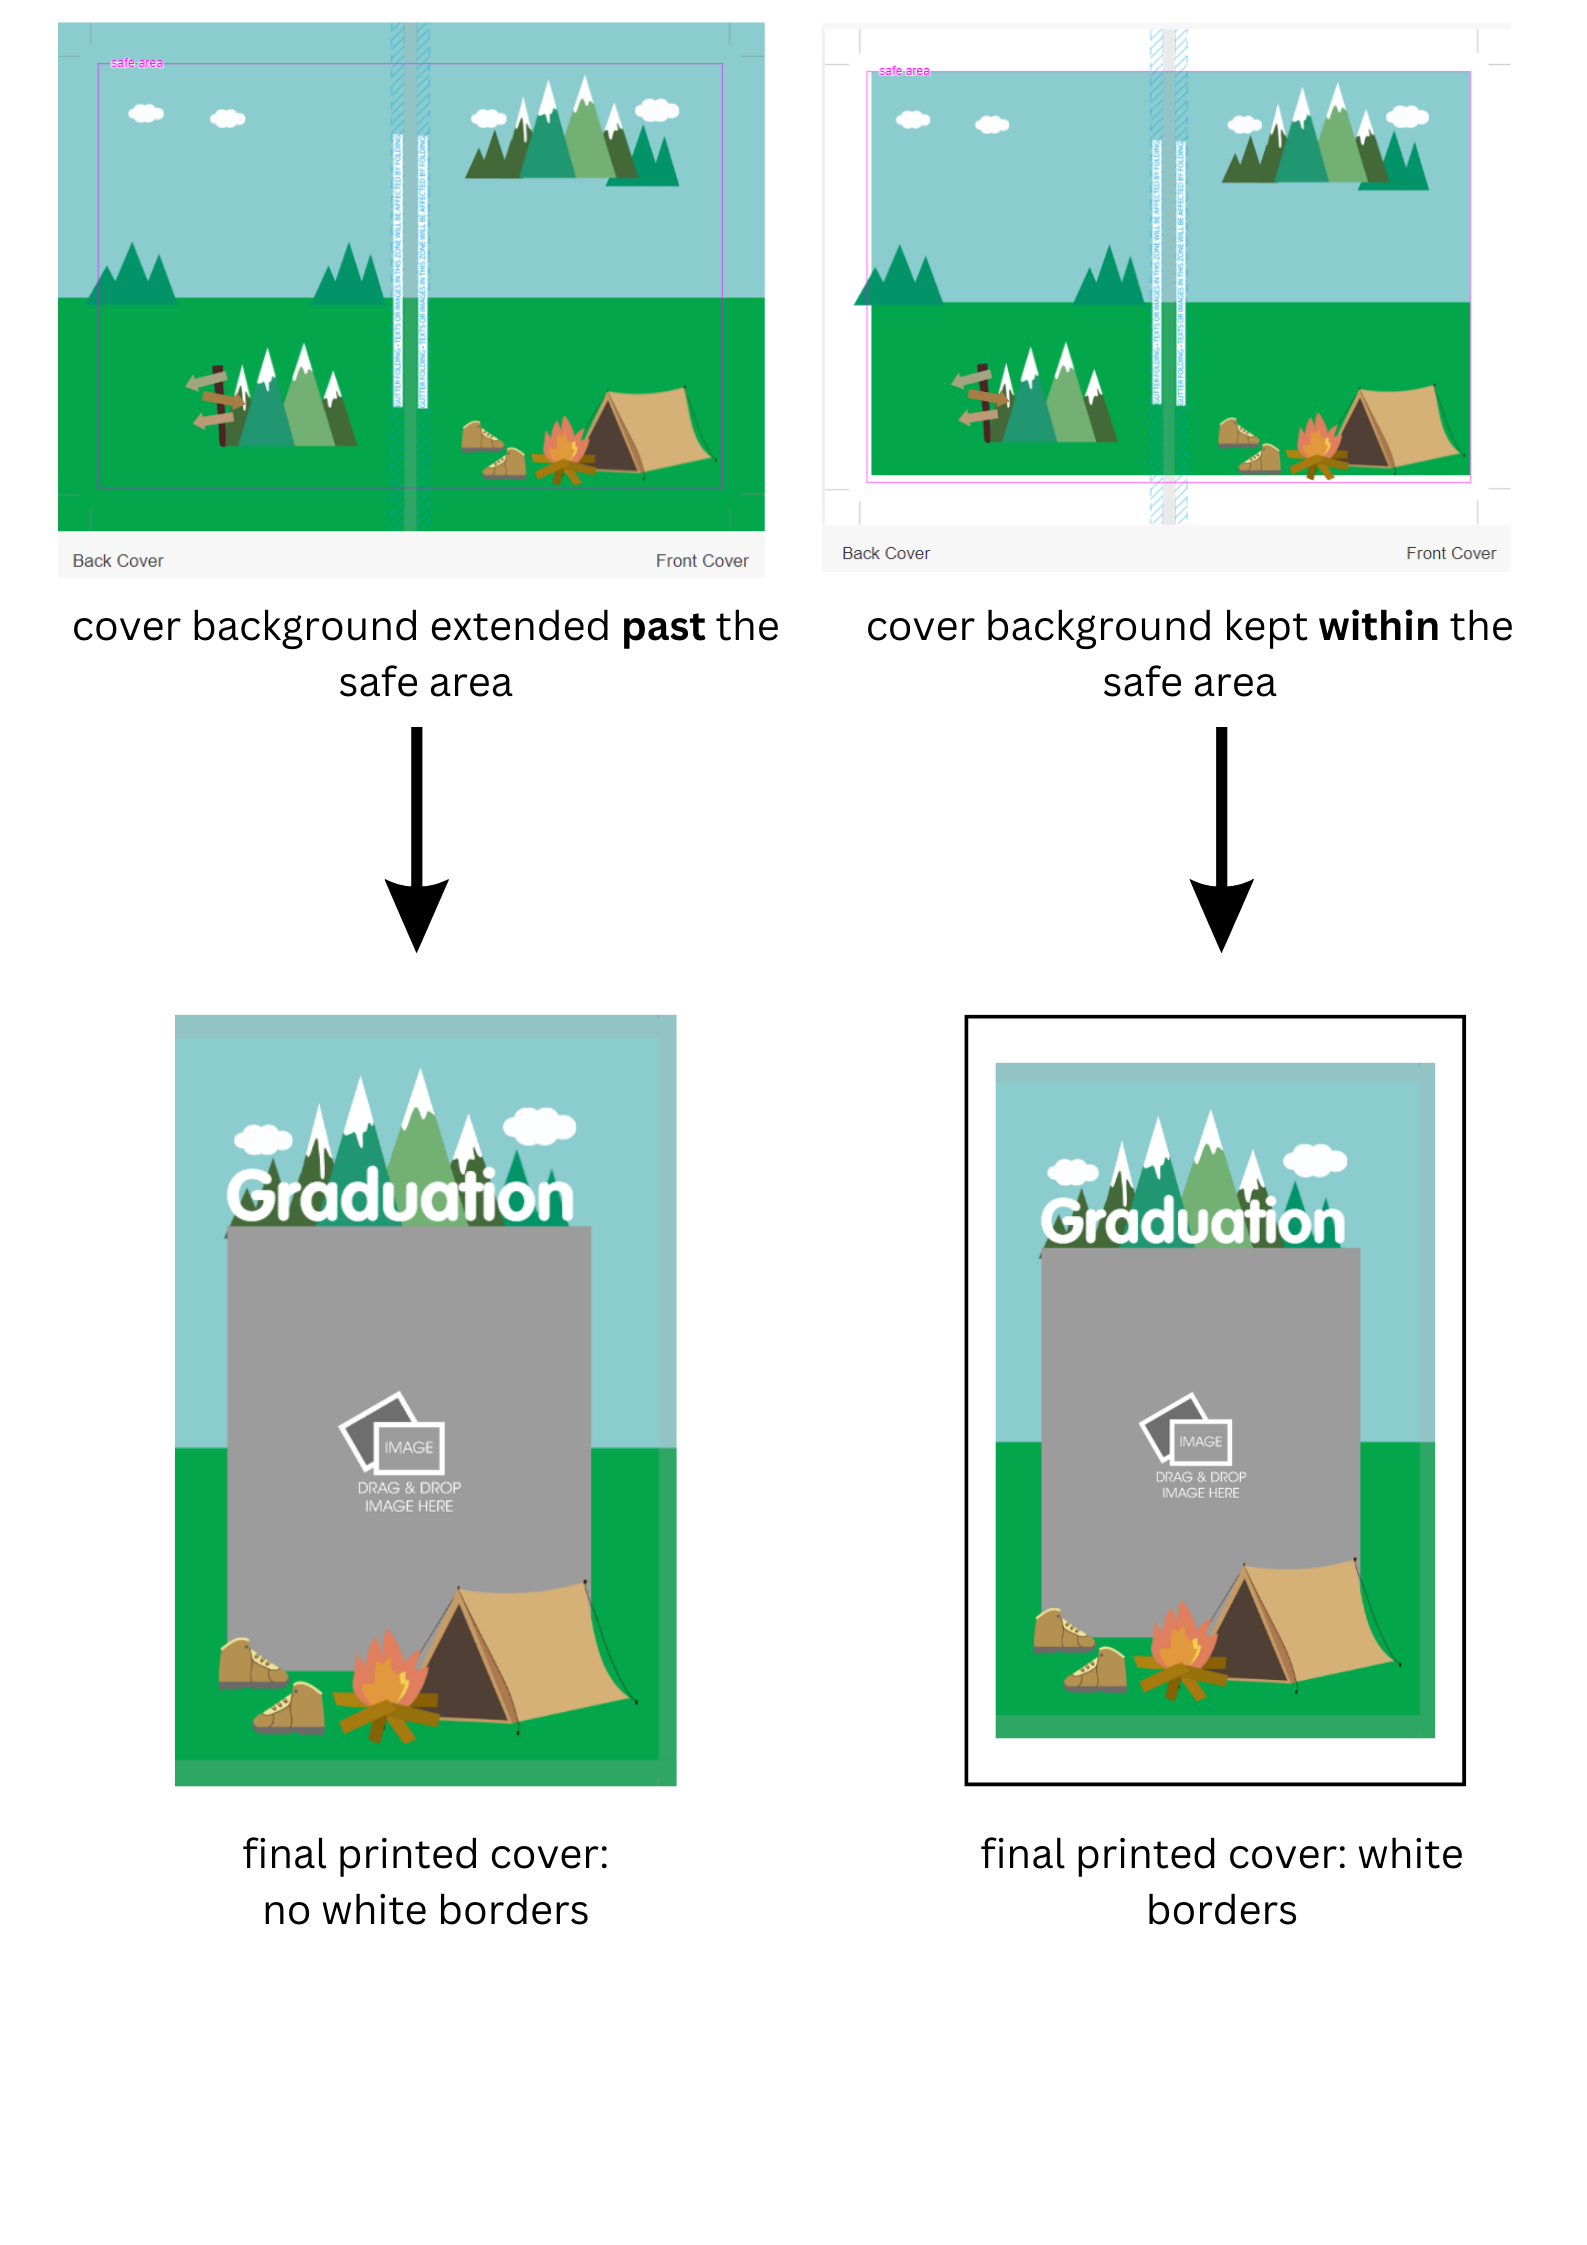
What is the pink "safe area" in the online editor?
The pink "safe area" line designates the area where you should keep all your photobook page content in order to avoid them being trimmed off in the printing process.
However, for cover pages, please ensure that you extend your background image to the very edge of the full art board, UNLESS you wish to have white borders in your final cover design for creative purposes.
Please refer to the illustrated guide below.
-
How many pages can I have in my photo book?
You can use any number of pages, so long as the total number of pages is divisible by 4. This is to ensure a balanced number of pages for binding.
-
How do I organise the pages of my photo book?
To add, rearrange or delete pages within your photo book, click on “Organise” on the bottom left of the editor.
Please note that the pages can only be organised as a spread (i.e., the two facing pages cannot be re-arranged separately). -
Can I remove your logo on the back page of my product?
No, you cannot edit or remove our company logo as it is part of our branding. This page will not be counted in the overall price of your product.
Placing an Order
-
How do I place my order?
Once you are ready to print your project, click on the “Add to Cart” icon under “My Projects”.
Verify Latest Project Version: When you view your cart, check the date and time of each project. The most recent version of your project will be listed at the bottom if you've added multiple versions. Even then, ensure that you have added the correct project to your cart.
You will receive an email to confirm your order after payment. Subsequently, another email will be sent to notify you when your order is shipped out -
How do I redeem my promo code?
Upon “Checkout”, you need to fill in your shipping details before entering your promo code.
Please remember to click “Apply”. Your promo code will be reflected before you proceed to payment.
We will not accept any promo codes once your order has been confirmed.
Please note that only 1 promo code can be applied per order.
-
Can I cancel/make changes to my order after making payment?
Order cancellations or amendments will NOT be accepted once payment is made. Prior to carting out, users are advised to check their project carefully and ensure that:
• Photobook pages are arranged in the right order
• Page designs are kept within the safe area (unless intentionally placed for creative purposes)
• There are no mistakes in text or graphics
• Your ordered quantity of products is correct
If you require assistance to check your work, please write to us at hello@plog.com.sg BEFORE checking out your item. Once your order has been placed, we can no longer assist you with any project changes or cancellations. -
I was unable to confirm my order. What do I do?
Hover over the person icon in the top right corner of our website
Click on "My Orders."
You'll be taken to a page that lists all your orders, including any with pending payments. For unpaid orders, follow the prompts to complete your payment. Once payment is successful, an email confirmation will be sent to you (make sure to check your spam folder if you don't see it).
-
When will I receive my order?
The estimated production lead times of our yearbooks is 8 working days, which may or may not be extended depending on the volume of orders. Please also allow an additional day for delivery.
In order to avoid delays, we advise that all parents place orders for their yearbooks as soon as possible, or at least 14 days before the date of school closure.
You will be notified of your order confirmation via the email after payment is completed.
You will be notified of your order shipment via email once your order is shipped out -
What are the standard shipping fees?
Our shipping fees range from $3.00 to $30.00 depending on your order.
-
Can I speed up my order?
We no longer allow order expeditions.
All yearbooks now have an estimated production lead time of 8 working days + 1 day delivery that may or may not be extended depending on the volume of orders and the date of your order placement.
If you require your yearbook to be delivered early, we advise that you place your order at least 14 days before school closure to avoid potential delays. If you choose not to do so, the waiting time for your yearbooks is liable to being increased to 10 working days. -
Do you offer discounts for bulk orders?
Yes, we do! For more information, please e-mail us at hello@plog.com.sg.
-
Can I repurchase a previous order?
To repurchase a previous order,
1) Hover your mouse over the profile icon on the top right corner of the screen and select ‘My Orders’.
2) Click into the invoice number of the order you wish to repurchase.
3) Once in the order page, you may make any adjustments to the specifications of your products or quantity if necessary before proceeding to checkout. -
You don’t seem to ship to my country! What do I do?
If your country is not available in our location drop-down box, please email us at hello@plog.com.sg BEFORE proceeding to confirm your order. We will then add your country to the list upon request. We thank you for your understanding!
-
Are there any final checks I should make before placing my
order?
To minimise any printing mistakes, please ensure that:
yearbook pages are in the right order
Your designs are kept within the safe area
Low-resolution images are removed or replaced
Mistakes in text or graphics are removed or amended
For hardcover, ensure that the image for the front cover extends beyond the trim line to prevent white borders
Once confirmed, p;log will not be responsible for any errors in your print, text or design.
Payment via HitPay
-
Select PayNow QR / Card / Alipay upon checkout
Upon successful payment, you will receive an order confirmation email.
Hitpay’s secure payment checkout page is designed and maintained by leading banking and payment professionals in Singapore. It features built-in payment tokenisation, encryption and fraud-detection infrastructure for maximum payment security.
There is a small processing fee for payments made via credit card. This fee helps us cover the charges imposed by credit card companies for handling transactions. We strive to keep this fee as low as possible to provide you with the best shopping experience.